I started my blog on Google’s free Blogger platform in 2011, but soon found that I didn’t have enough control over design elements, and I switched to the WordPress platform where I now recommend that everyone start. Everyone eventually ends up on WordPress when they start to take blogging seriously, or want their website to be part of a real business.
A WordPress theme provides flexibility and customization features that Blogger could never provide. The best part is that you can set up a WordPress Blog in 5 Minutes! Why WordPress? The WordPress blogging platform is the most popular software in the world. It is also one of the easiest to use due to its flexibility and user-friendliness.
- Choose a name for your blog and URL.
- Choose the best hosting company.
- Register your URL
- Install WordPress
- Customize your blog with a template.
- Plan your site structure. SEO
- Publish your first post.
- Promote your blog on social media.
- Create a lead magnet to collect subscribers.
- Sign up for mailchimp to create a newsletter.
Step 1: Choose a Name – Blog Name and URL
For my first blog shortly after my daughter was born, I came up with the clever name Boogers Are Yucky. It made perfect sense to me at the time, especially since being a new mom was all encompassing. But my background as a yacht chef made me want to share recipes and anecdotes from my adventures. My Dad pointed out that it was kind of gross to go to a site called Boogers to get a recipe, no matter how good it was. When I switched to a hosted WordPress site, I bought my name URL and now I feel like I can blog about whatever I want since I am the brand. Brainstorm several names you want to try so that when you are ready to begin you can try them to see if they are available.
Disclosure: Some of the links on this page are referral links. This means that, at no additional cost to you, I will earn a commission if you make a purchase.
Step 2: Choose a web host
There are many hosting companies out there, but for a WordPress site, Bluehost is the only hosting service WordPress recommends. Bluehost has been the number-one recommended hosting service for their platform for nearly 10 years. If you sign up through this tutorial, you’ll get a special price on shared hosting starting at $3.95/month for 36 months and your domain will be included free! For this deal, you pre-pay for all 36 months up front, but if you decide to cancel at any time, they offer a money-back guarantee. So if you have Bluehost for 6 months and decide to switch, they will refund the remaining 30 months.

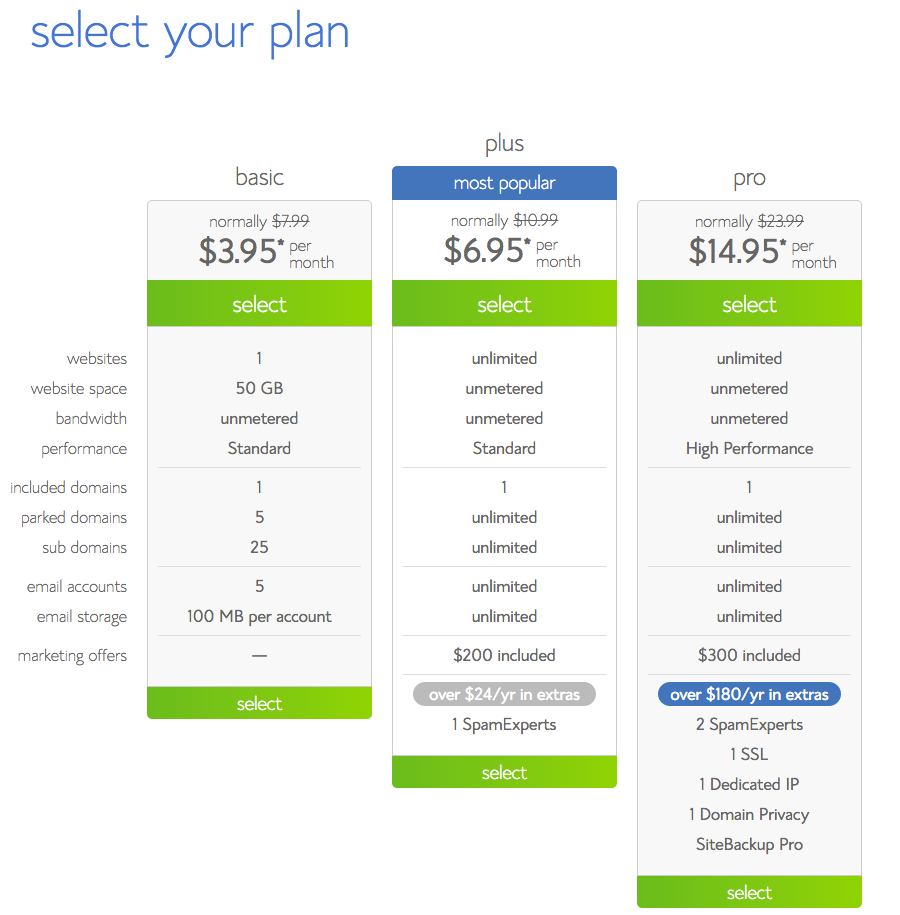
The next page you’ll see is where you choose which plan you want. If you’re just starting out and simply don’t know if this is going to be your business, I recommend going with the basic plan on the left. If you’re serious about monetizing your blog, growing a list, and using your site as a business, you’ll want to start with the Plus plan.
Click the green “select” banner.
Step 3: Register your domain name.
This is the name you’ve decided upon in Step One. It’s time to make it official! (If you already own a domain name, choose that option instead).
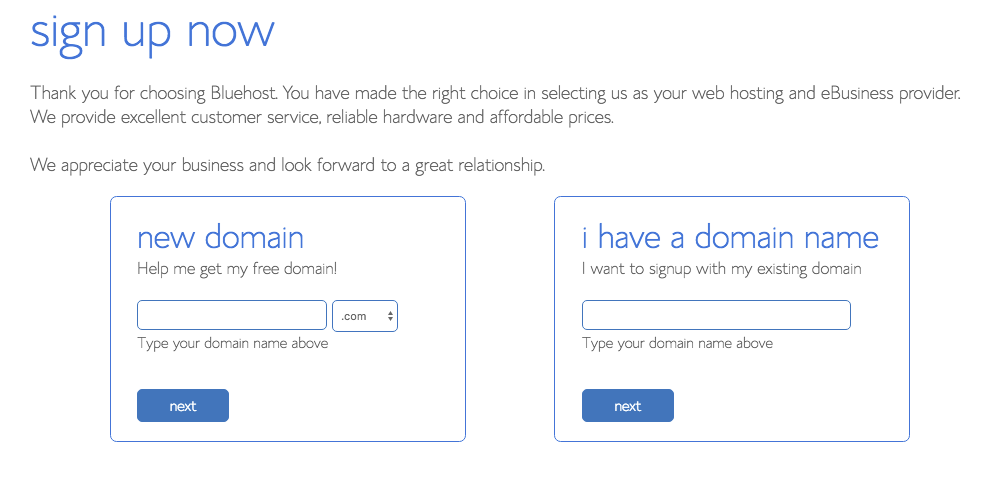
In my opinion, it is very important to get the .com url. Don’t use any hyphens or other characters, it just makes it harder for people to type the address. If your name isn’t available with .com, try adding the word The before it. Or add the word Blog after it. Once you have settled on the domain name, click the blue “next’ button.
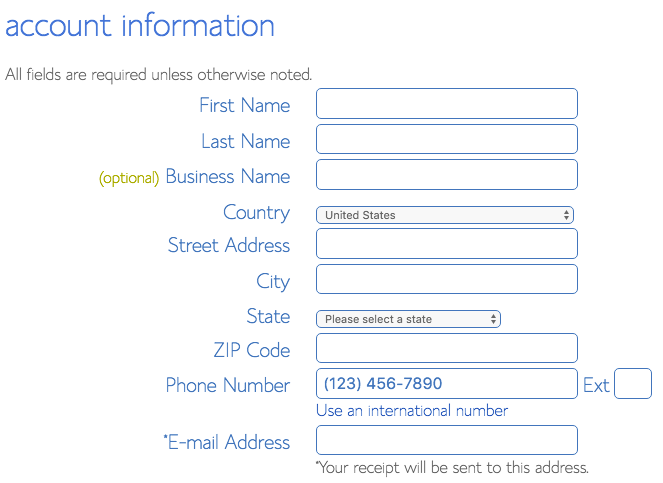
Enter your account information.
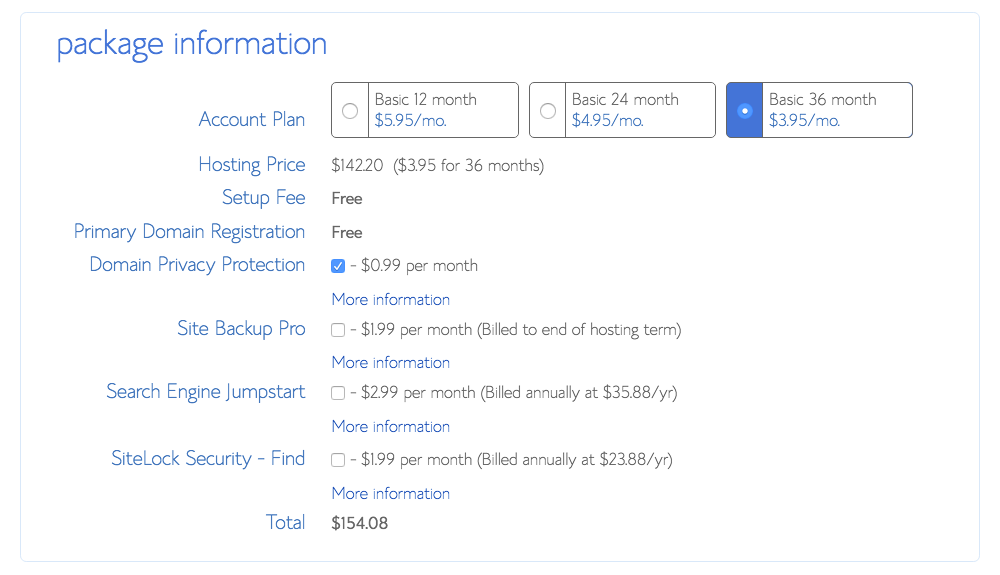
Select an account plan.
Here, you will choose a package based on how much you want to pay up front. Paying for three years up front gets you quite the bargain! And, it’s completely refundable if you need to change in the future.
IMPORTANT NOTE: About half way down the image below, you’ll see Domain Privacy Protection. While none of the other options are imperative when you start, I would recommend this one. It will keep all your information private. Also, the Domain Privacy Protection option is only available if you registered a new domain rather than using an existing one.
Enter your billing information.
Fill this in, click the confirmation box after reviewing, and submit.
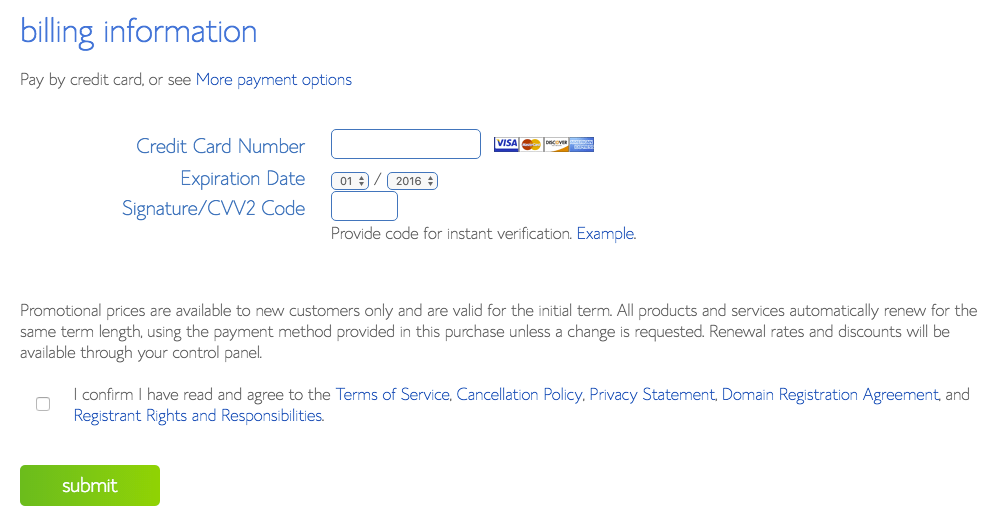
You will be asked if you want any upgrades. I recommend declining. (You can always add them later.)
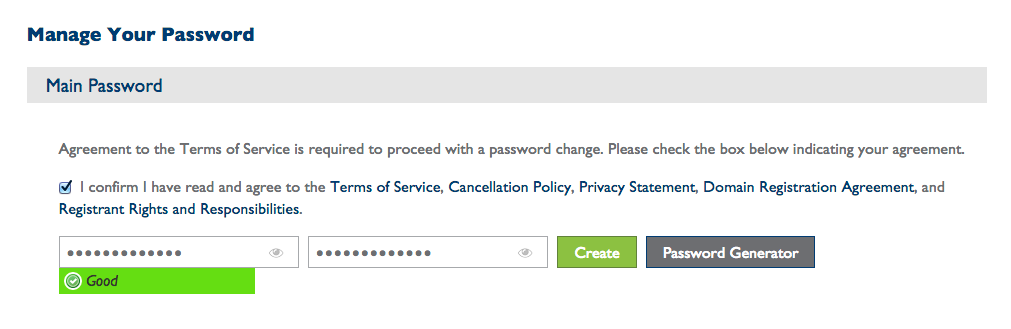
Next you’ll choose a password for your new account.
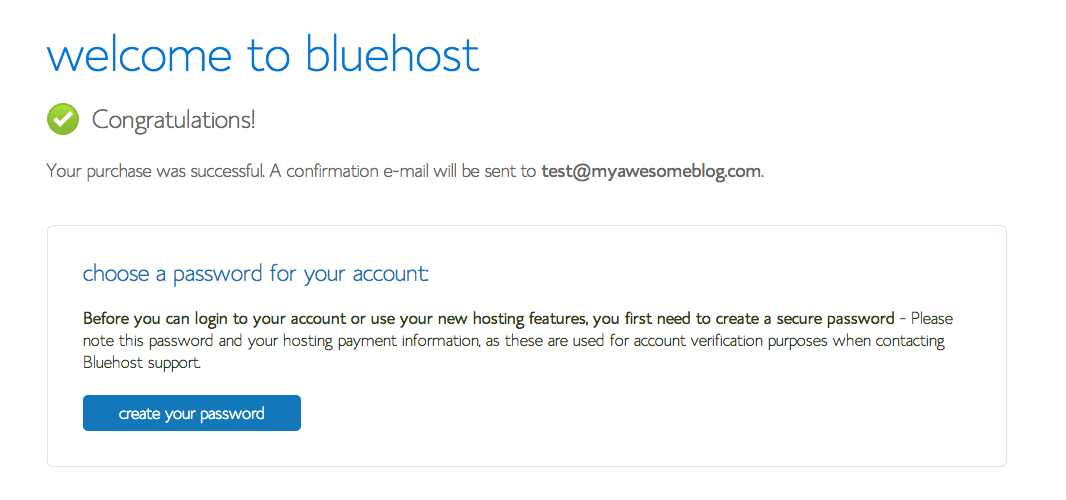
Be sure to pick a strong password. You don’t want to risk being hacked!
Check your email for your new login information.
Bluehost will have sent you a welcome email including your login information for the Bluehost control panel (also known as cpanel). Be sure to store that information for future use!
Click the link in your email from Bluehost.
Next, enter your cpanel login information and select the “hosting login” option.
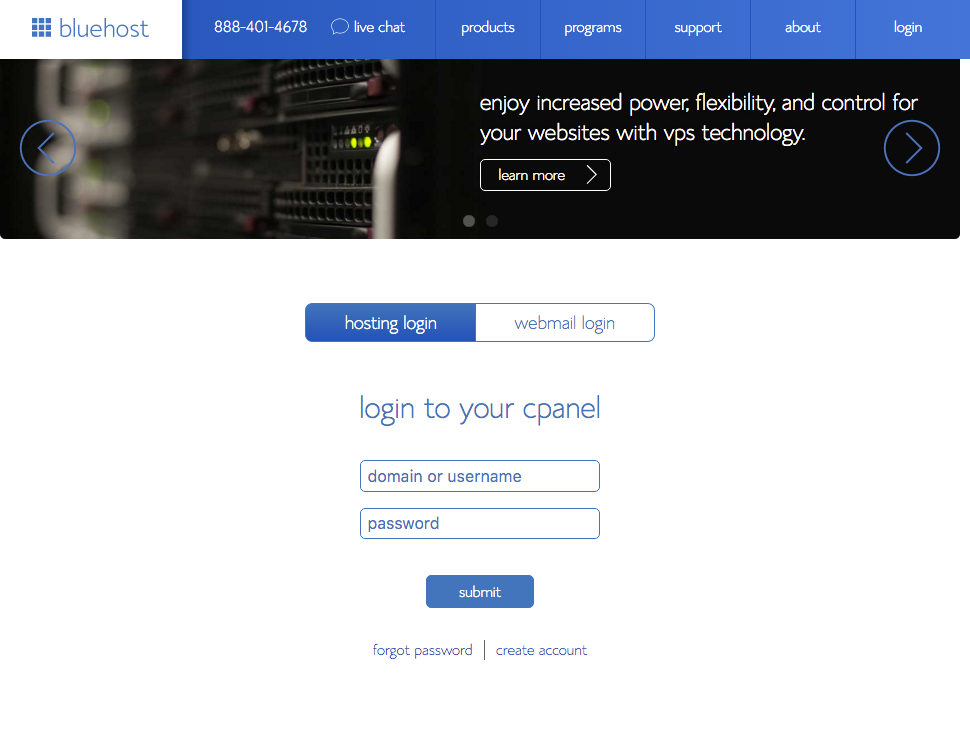
Once you log in, a helpful box will appear, asking if you would like their team to help you set up. You can close that box since I’m guiding you through the process.
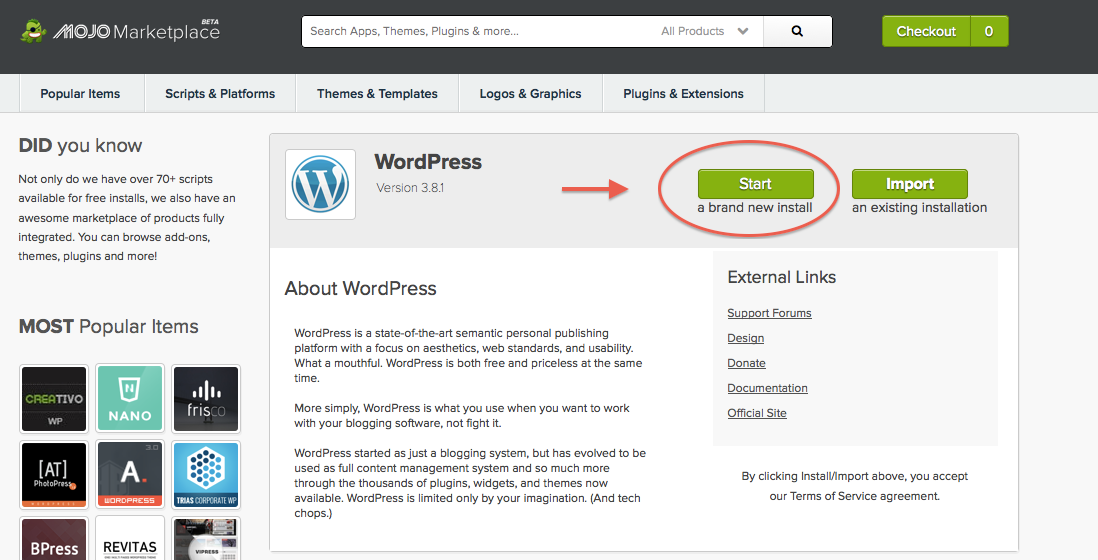
STEP 4: Install WordPress.
After you log in to your cpanel, click the Install WordPress icon under Website.

Click start to install WordPress.
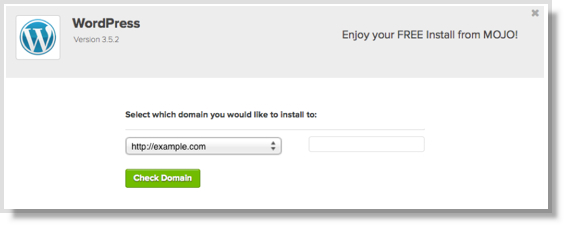
Choose Where to Install WordPress
Select your domain from the drop down window. Click Check Domain.
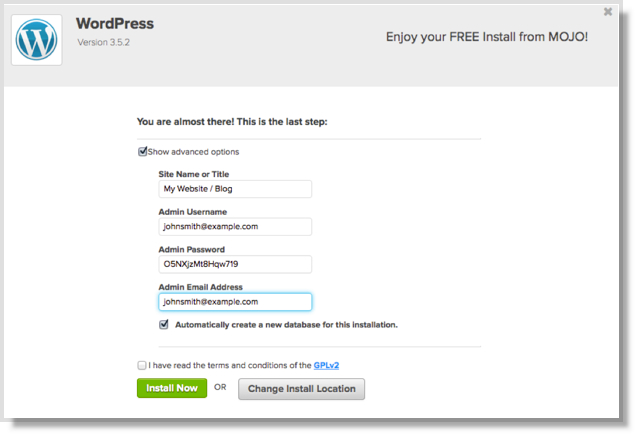
Enter your WordPress User Information
Check the Show Advanced Options box. Enter your site name (for example, Lizzie Lau). Note that your site name does not include the .com or whatever yours ends with.
Choose a user name and password for WordPress. Enter your email address, read over terms and conditions, and click the Install Now button.
When the installation is complete, you will see the indication below.

Be sure to take note of the information to access your WordPress site.
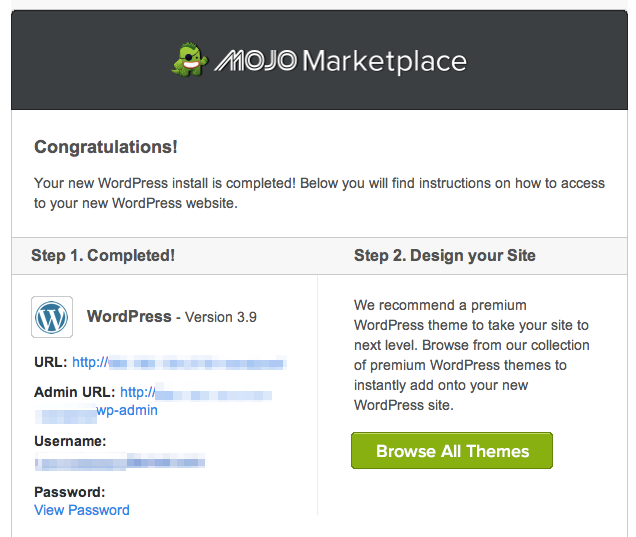
Your setup is complete! Check your email for a message from Mojo Marketplace. Be sure to save this email, as it contains your important login information.
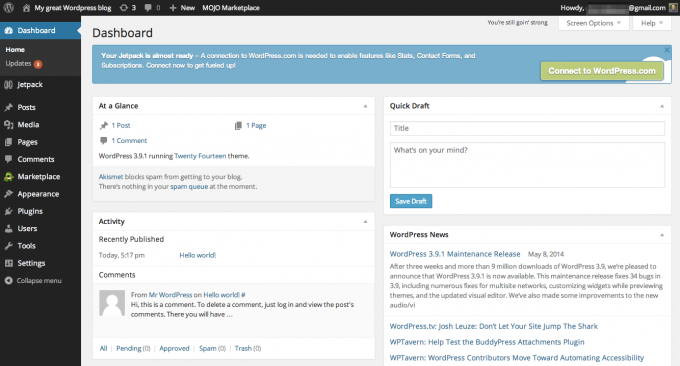
Now you can log into your self-hosted WordPress blog or website. From your WordPress welcome email, click Login URL and enter your login information. This will take you to the back end of your site, where you will write your blog posts.
Congratulations! You are now ready to share with the world! You can start publishing posts immediately. Now is also the time to start thinking about themes to jazz up your little piece of the internet.
Blogging tips
Here’s The Thing … a tip that’s going to save you time on Instagram
26 Facebook Groups For Promoting Your Blog
Blogging Tips Roundup – How to make money blogging
